
The project I am about to share is one that I am really proud of. The after is one thousand times better to me than the before! You can see for yourself...

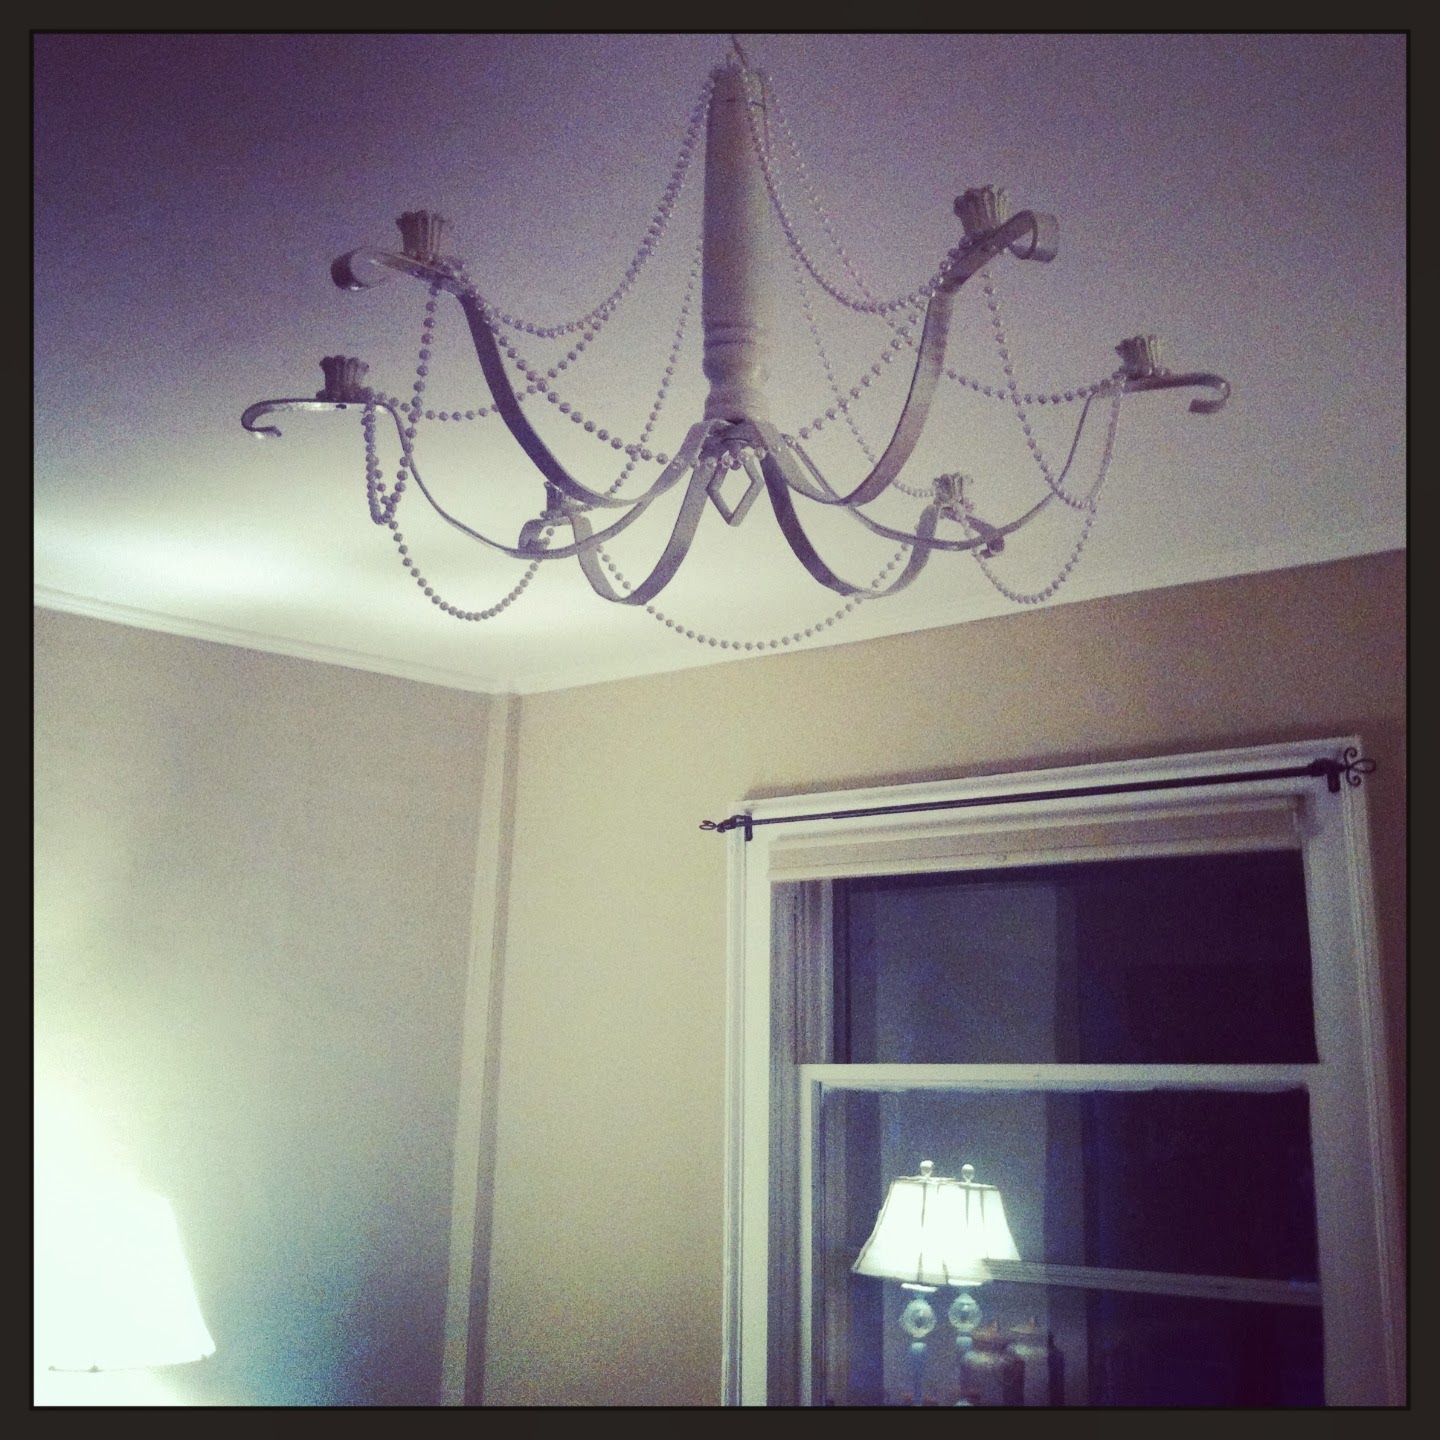
This is what was hanging from our living room ceiling when we bought the house. I wish I had snapped a picture before I yanked it down but by the time I thought about taking a picture, the very thought of putting it back up gave me the creeps. WHAT IS THIS?! I can't tell you how many times I scrolled through my camera roll on my phone and thought "why did I take a picture of a spider?" Stefan liked it hanging up there. He said it was "colonial" and "reminded him of a castle" while I said it belonged in a dungeon. He wasn't quite understanding that castle and shabby chic don't exactly go together. There was no way it was staying up there as it was. So, I did a little search on Pinterest to figure out how I could spruce this baby up. I found a picture for inspiration and went for it.
Isn't the after way better?! I love laying on the couch and taking in all of the little things that catch my eye in the room. The new-do on this chandelier catches my eye for all of the right reasons. This picture is before the final coat of spray paint and before I added the candles.
Here's how it was done.
Stefan's mom gave the original chandelier a few coats of ivory spray paint. I took some pearl bead garland that my mom gave me to use for the wedding and cut 12 strips. Six strips were to drape from the top of the fixture to the base of each candle holder and the other six were to drape from each candle base to the next. I measured the length I wanted the beads to drape before I started cutting. Then I simply started hot glueing the end of each strand and attaching it to the chandelier. It took a half hour tops. I was so excited to see it.. I put it up before spray painting the beads ivory to match. After a few days of admiration I was ready to complete it. I gave the entire thing a few coats of ivory spray paint, let it dry, and have been gawking over it since. It was SO easy to do and I didn't have to buy a thing!! Definitely an upgrade from before.
I'm now brainstorming diy ideas for a small chandelier in our guest bedroom. I think a trip to goodwill is in my near future ;)
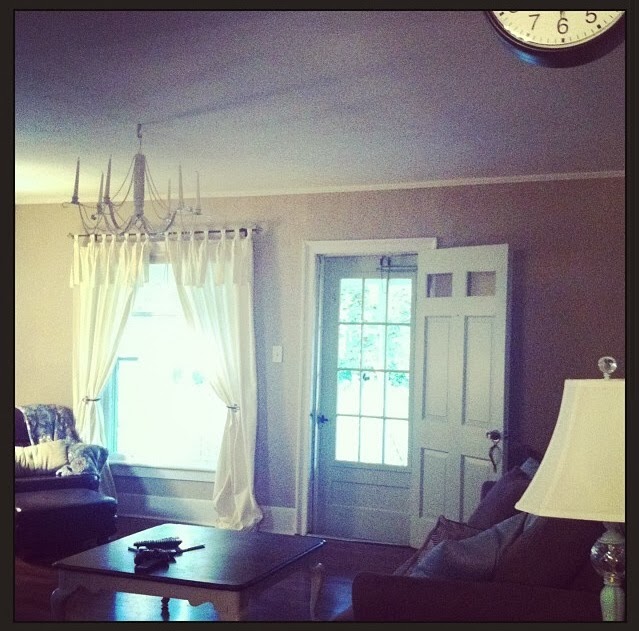
Here is a little peek into our living room. I'm loving the way it's all coming together and I can't wait to share more with you! Let me know what you think!!

No comments:
Post a Comment